Step 1 – The Barrel
I obtained a food-grade barrel from DGM Barrels & Totes in Vidor. It is very important that you select a barrel or tote that did not previously contain anything toxic. My barrel previously contained olives.
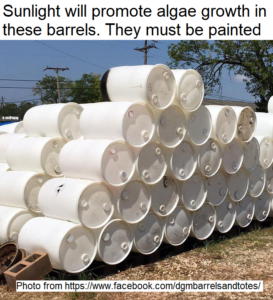
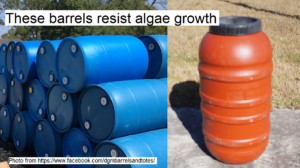
NOTE: an opaque barrel (one that light will not shine through) is highly preferred over a translucent barrel. This is because sunlight promotes the growth of algae and bacteria. Translucent containers, such as white plastic barrels and totes, are prone to become fouled with algae. Opaque barrels are less likely to have this problem. Translucent containers can be used, but they should be painted with a weather-resistant paint. It’s not a bad idea to also enclose your rainwater storage in some sort of housing to protect it from sunlight. This can also make it more aesthetically pleasing, and hide it from the view of others.
Step 2 – The Kit
For this project I selected the 2×3 EarthMinded Diverter + 2 blue top shut off valves + drill bits kit, at a price of $39.99.. This kit allows you to tap into your existing rain gutter downspout without disassembling the downspout. The kit includes the following:
Do Not Drink Sticker
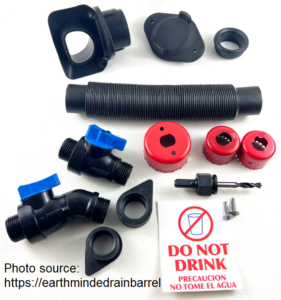
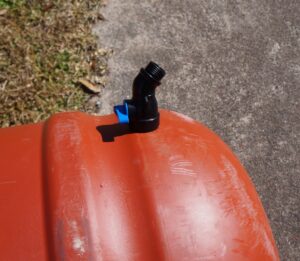
This kit has two valves: a straight drain valve to mount at the bottom of the barrel, so the maximum amount of water can be drained, and an angled spigot which can be mounted higher up on the barrel so that you can fit a watering can underneath it.
In this project, however, I’m going to build a base of cinder blocks to raise the rain barrel up off the ground. This increases the hydrostatic head (i.e. it provides a little more water pressure), plus it allows us to get a watering can or bucket under the lower valve. For this reason, I’m going to use the angled spigot at the bottom of the barrel and save the straight drain valve for some other project.
Step 3 – Constructing the Barrel
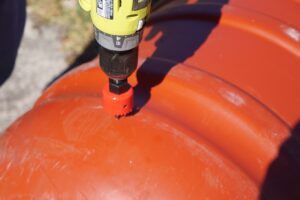
Use the small hole saw (drill bit) included in the kit to drill a hole in the side of the barrel about 2 to 4 inches up from the base. The height of the hole will depend on your barrel. You want the hole to be as close to the bottom as possible, in order to be able to drain as much water as possible from the barrel. On the other hand, if the side of the barrel is curved near the base, as the barrel in the photo, you need to locate the hold above the curve in order to get the best water-tight seal possible.
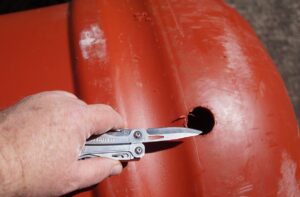
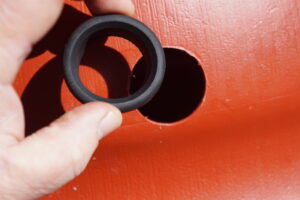
Next, use a sharp knife to carefully clean any burrs around the edge of the hole, being careful not to make the hole larger. Now insert one of the threaded seals into the hole. You may need to pinch it a bit to get it to go in. You can even lubricate the seal with soapy water.
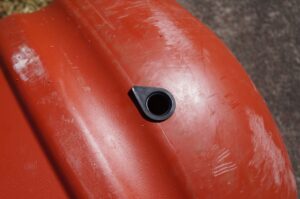
With the seal in place, you can screw the spigot into the seal until it is firmly seated. The seal expands inside the hole as the spigot is inserted, forming a water-tight seal.
Now we turn our attention to the water inlet at the top of the barrel. Use the medium sized hole saw to drill a hole about 2 to 4 inches below the top of the barrel. Again, we want to avoid drilling the hole in the tapered or curved part of the side. As with the lower hole, carefully remove any burrs with a knife, then insert the larger seal. Use soapy water to lubricate it, if necessary.
Insert one end of the fill hose into the seal. Just like the threaded seal with the spigot, this seal expands inside the hole as the fill hose is inserted. Once the hose is in, it will be quite difficult to remove.
Note: It is possible to install this fill hose in the top of the barrel. However, the down spout diverter that comes with this kit has a special feature that acts as an overflow outlet. Installing the fill hose in the lid of the barrel will defeat this feature, resulting in uncontrolled overflow from the top of the barrel.
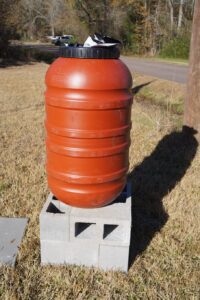
Step 4 – Base Construction
Before we install the down spout diverter, we need to set up our base and place the barrel on it. This is so that we can install the diverter at the proper height.
Your rain barrel will need to be located close to an existing down spout. The maximum reach of the fill hose that comes with the EarthMinded kit is about 3 feet, but it’s best to get as close to the down spout as possible. Try to locate it within 2 feet of the spout.
First you’ll place the 24” x 24” stepping stone where you want your rain barrel to go. You will want to use your shovel to remove the grass from this area. Make sure the soil is level. If you like, you can use gravel or sand to level the spot. Place your stepping stone on the prepared area, then verify again that it is level.
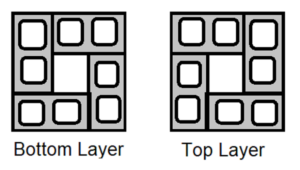
Now place the cinder blocks on the stepping stone foundation in the pattern shown below.
When you place your barrel on the base, it will look something like this:
Step 5 – Connecting to the Down Spout
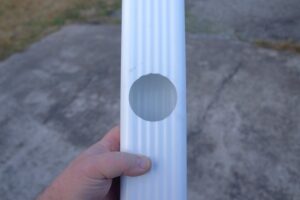
Now you are ready to connect your rain barrel to your down spout. To do this, you’ll use the large hole saw. This diverter is made for a 2” x 3” down spout, but it can be used with a 3” x 4” down spout. This is not optimal, but it can be done. If you have a 3” x 4” down spout, I recommend you order the correct size diverter from EarthMinded. Regardless of the size of your down spout, you use the large hole saw to drill a hole in the 3” side of the down spout. NOTE: make certain to drill the hole in the 3” side, not the 2”, not the 4” (depending on your down spout).
On the down spout, mark a spot on the 3” side that is level with the center of the fill hose on your barrel. The diverter needs to be at the same height as the fill hose so that the overflow feature will work properly. This way when the barrel is full the overflow will simply flow down the down spout and be directed away from your foundation. Otherwise, the barrel would overflow and potentially cause foundation problems later.
Use the large hole saw to drill a hole in the center of the 3” side. Once the hole is drilled, remove any large burrs with your knife if needed. Now squeeze the rectangular part of the diverter and twist it into the hole. Yes, we’re fitting a square peg in a round hole!
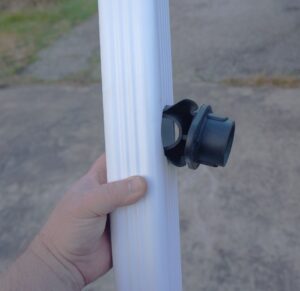
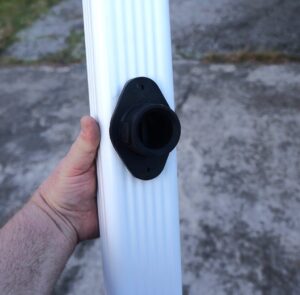
Make sure the diverter cup is facing up inside the down spout. Use the Phillips head screwdriver to secure the diverter in place using the self-tapping screws provided in the kit. Plug the other end of the fill hose into the diverter, and you’re done!
Other Options
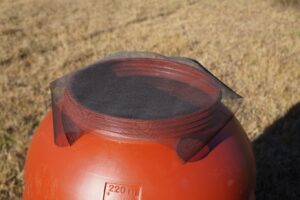
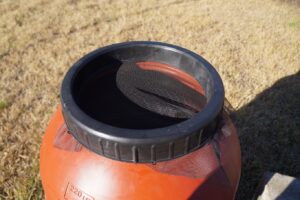
If you prefer to route your down spout to pour directly into your rain barrel, you can remove the lid of the barrel and cover it with window screen material to filter out leaves and prevent mosquitoes from getting in and laying eggs in your rain water. The parts list above includes fiberglass screen material for this purpose.
Also, you may not want to order a kit from EarthMinded. There are other options for connecting a spigot to your barrel.
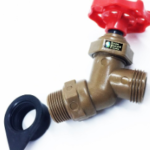
You can get a spigot (faucet) at your local hardware store, but how do you connect it to the barrel? Most spigots have a threaded end designed to connect to a threaded water pipe. You can drill a hole in the barrel and insert the threaded end of the spigot, but then you need to get inside the barrel to secure the spigot in place with a nut. This is challenging, to say the least.
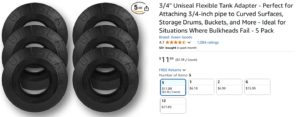
An easier way to attach a spigot is to order seals made by Uniseal. These are available on Amazon in a variety of sizes. Like the seals available in the EarthMinded kit, the Uniseal seals allow you to drill and appropriately sized hole, insert the seal, and then insert a length of pipe into the seal. As the pipe is inserted, it causes the Uniseal to flare out inside the barrel, forming a tight seal. No need to secure it in place with a threaded nut on the inside of the barrel. Uniseals can be used with either PVC or metal pipes. Just drill a hole, insert the Uniseal, insert the pipe, then you can connect the spigot or whatever fitting you like. You can also use the Uniseals to connect two or more barrels together in series to multiply your water storage capacity. This opens the door to a wide range of possibilities.